Template Course
In this course, you will learn everything about ORKG templates. We will start by explaining what a template actually is, and continue with tutorials for template creation and template usage. We hope to show you how you can ease your work with the ORKG by utilizing the template feature.
What is an ORKG template?
In the ORKG, a template is a skeleton for the data structure of a contribution. These templates can be used in order to make the research contributions that address the same research problem conform to the same data structure. It allows users to quickly add some structure to their research contribution data and can help illustrate what kind of data is needed to make the paper comparable to other state of the art research.
You can find ORKG templates by clicking on Tools > Templates from the ORKG main page. This provides you with a list of all existing templates and a couple of filtering options. This helps you find a template that might be suited for your contributions.
If you click on any of the templates, you can find an overview of the template. These overviews have four tabs: Description, Properties, Format, Instances.
Template Descriptions
In this tab general information about the template are specified:
-
Name: the label that helps users to recognize the template.
-
Target Class: We specify that all instances of this template will be an instance of this class and they must be validated with the same structure. If not specified, a class is generated automatically.
-
Property: This is used to link the contribution resource to the template instance. Remember that we are defining a graph structure and that will be an arc that goes from the contribution resource to the template instance. And this property will be used as a label of that arc. If you want to link each property of this template directly to the contribution resource you can use "Has contribution" property in this field.
-
Research fields and Research Problem: Specify the research fields or the research problem where this template can be useful.
Template Properties
Here we specify the input fields that users need to fill out. We can specify the accepted values and the cardinality for each field.
Template Format
Some templates don’t require you to enter a label for its instances and this feature allows you to generate a label based on its description. This label is then displayed as the resource label, whenever you use the template for a resource description.
Template Instances
This tab gives you an overview of resources that use that template. This could also be a good starting point for creating a comparison.
Creating Templates in the ORKG
In this tutorial, you will find step-by-step instructions for the creation of templates.
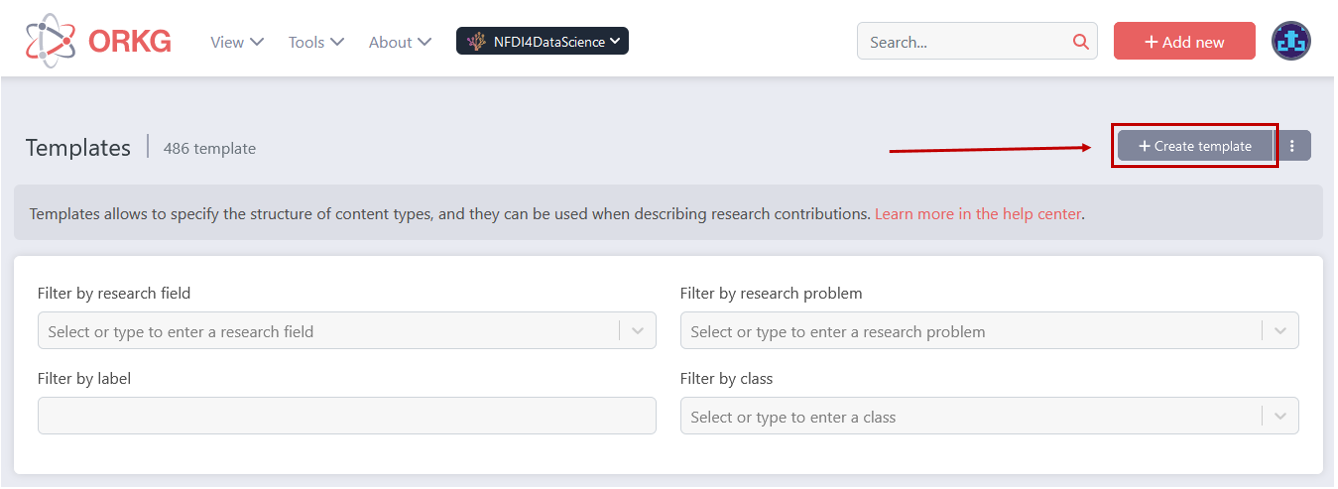
To start the template creation, you will need to click on Create template on this page.
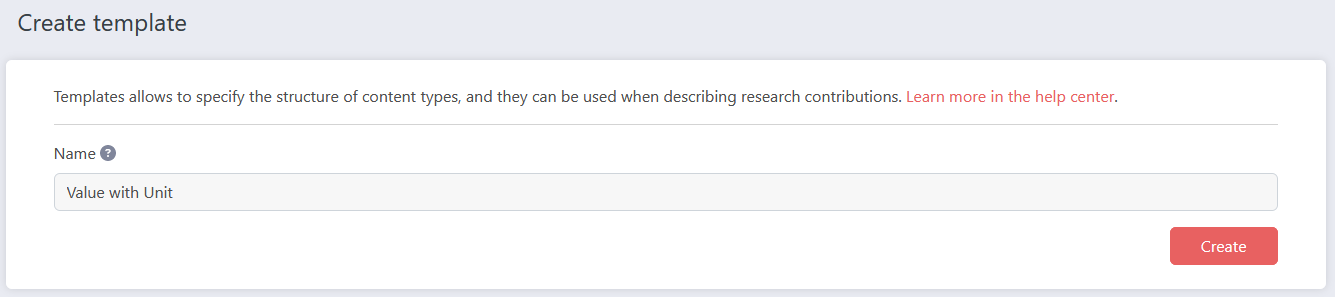
Step 1: Enter the name of your template. Then click on Create. Once you have clicked on this button, an empty template with this name is added to the ORKG.
Step 2: You are now in edit mode for the template, you have created. The tabs Description, Properties and Format can be edited here. In the Description tab you can edit template metadata such as the name of the template and a description. You can also add some optional information such as the research fields for which this template is relevant. Despite being optional it can be very useful to fill out these fields. For example, filling out the Research fields field will suggesti this template in papers relevant to the named research fields. This makes data more coherent and therefore better reusable.
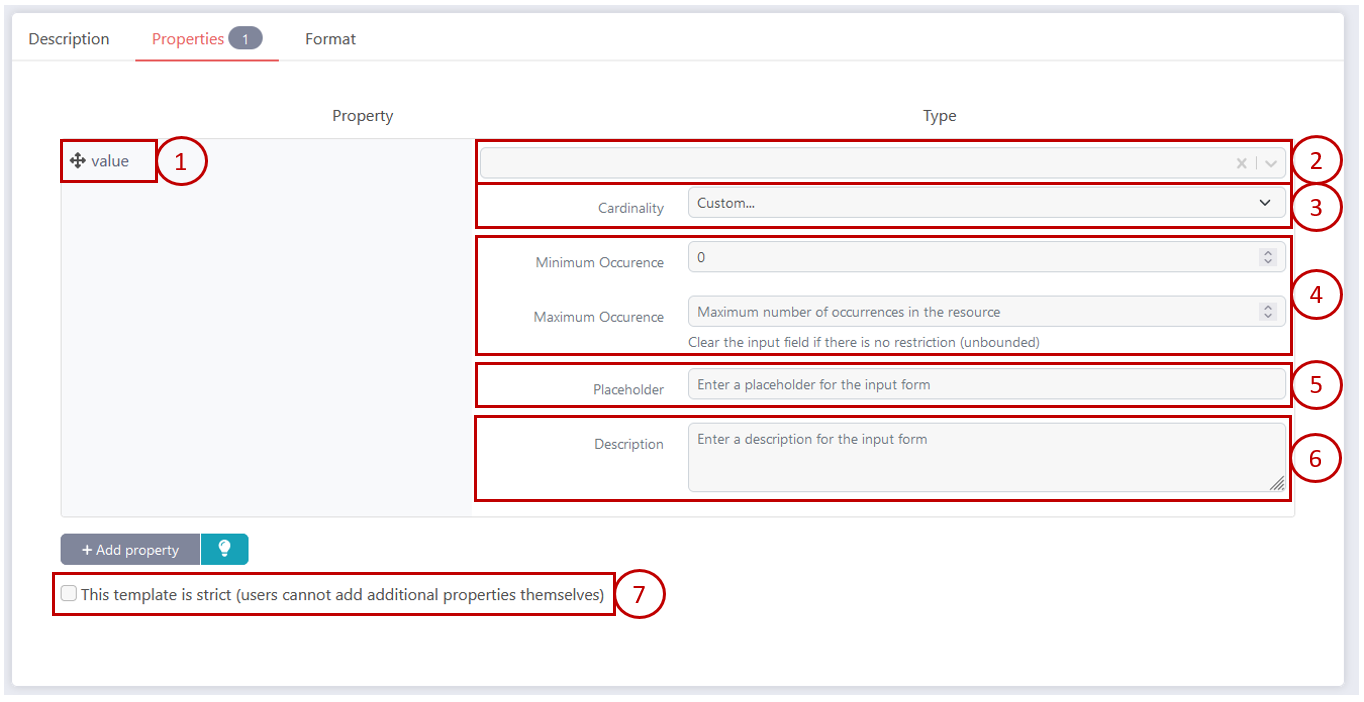
Step 3: The Properties tab is where you need to model the template data. After adding a property, you can specify how the value for this property can look like.
-
This is the label of the newly added property. You can edit or delete it by clicking on the pen or trash can icon below the label.
-
This field specifies the type of the value. You can choose a type from the dropdown menu. If you choose Text, you can then later also specify a pattern for the value. If you choose any number type, i.e. integer or decimal, you can also specify a minimal and maximal value.
-
Here, you can specify the cardinality of this property.
-
If you chose the custom cardinality, you can choose the minimum and maximum occurences here.
-
Here, you can specify a placeholder that will be displayed in case a user who uses the template does not fill in a value for this property.
-
You can now add a description for the input form.
-
If you don’t want other users to be able to add additional properties when using this template, check this box.
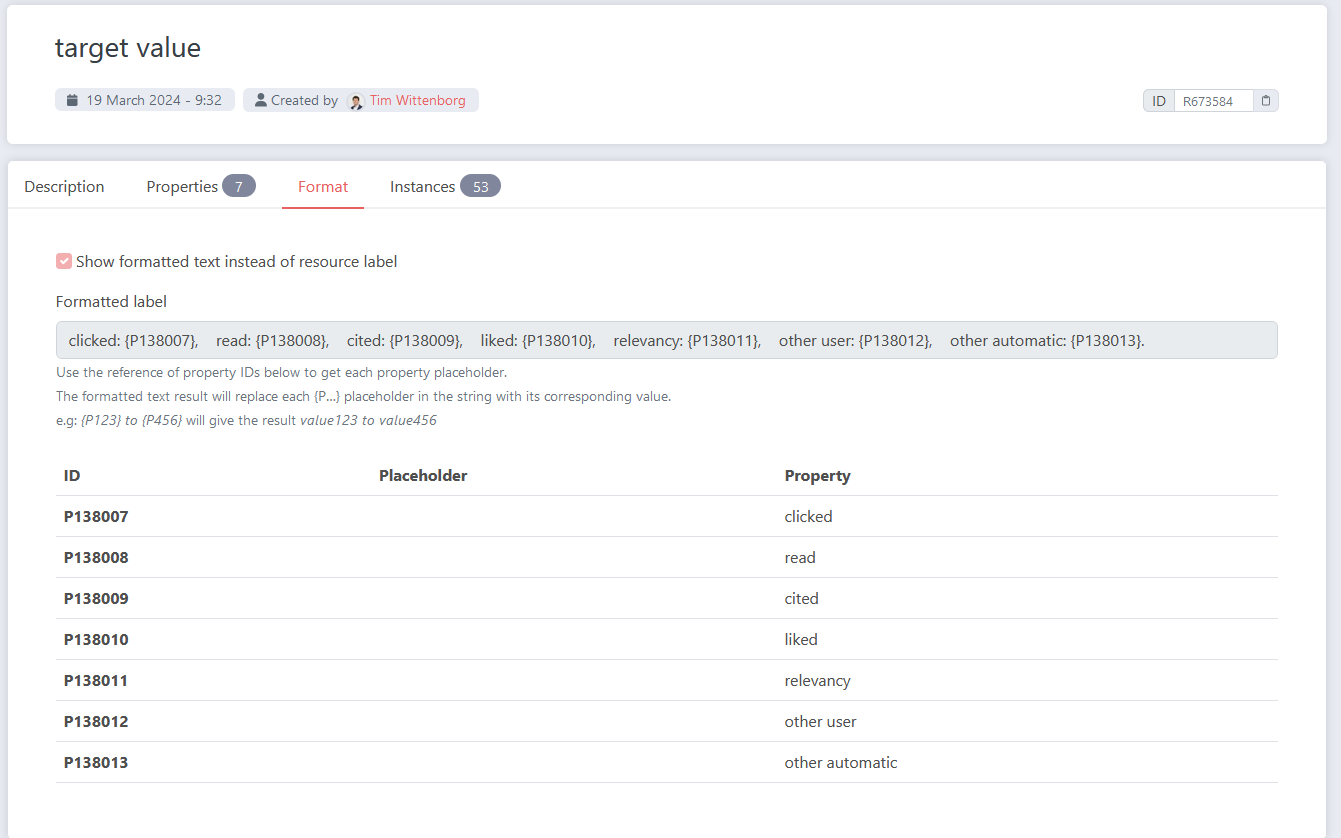
Step 4: If you want the resources that use this template to have a meaningful label, you can check the box Show formatted text instead of resource label in the Format tab. This reveals an input field and a table below. In the input field you can specify the new formatted label that each resource created with your template will have. Use the property ID from the table below in curly braces as placeholders for the respective values.
Step 5: Once you are happy with your template, you can click Save on the top right of the page. Your template is now ready to use!

Using ORKG templates
You can use templates in the editing mode of papers and resources. To select a template, click on the Template button.
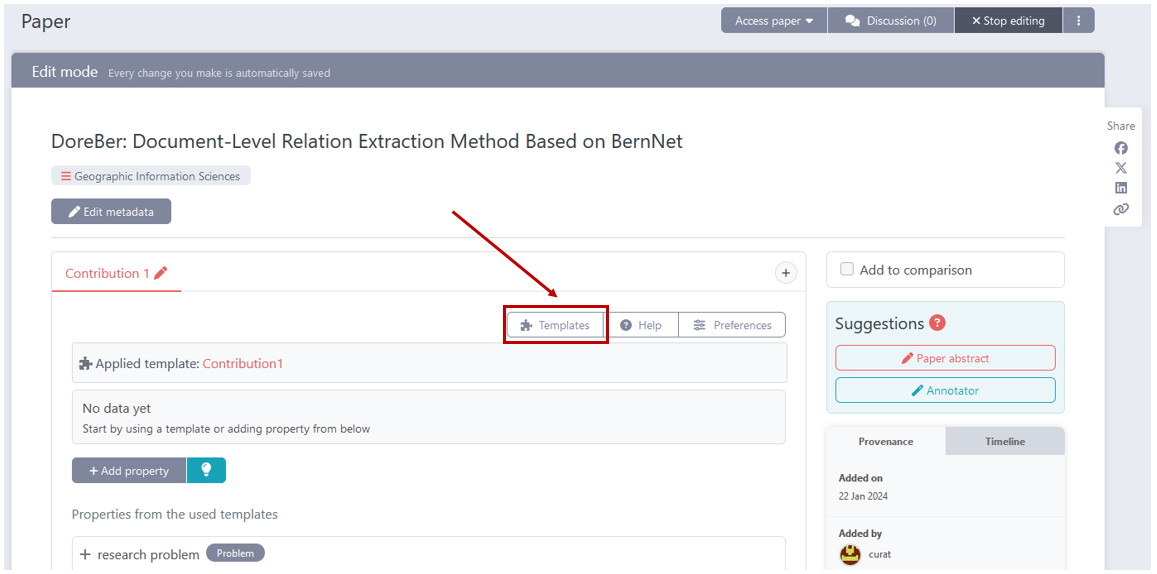
This opens the Template gallery pop-up window. Here, you can search for the right template to apply.
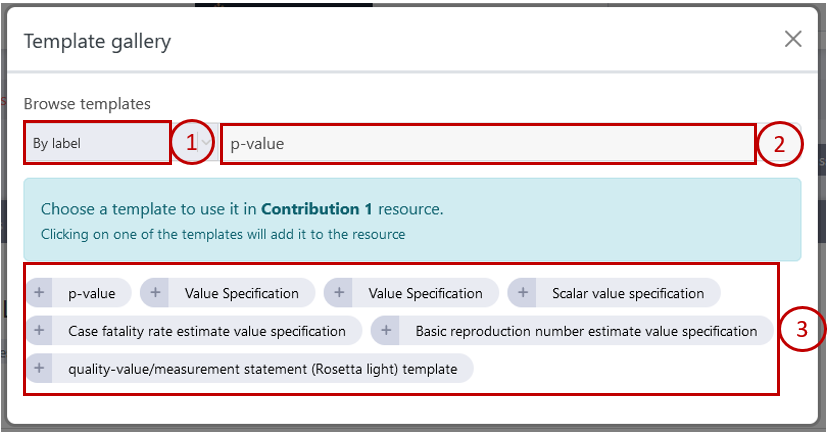
-
This dropdown menu gives you 4 options by which you can browse templates to find the right fit: By template label, by research field or research problem that the template has been assigned to or by class.
-
Here, you enter the search term.
-
These are the search results that you can choose from. If the search results are more than can fit in this space, you will find an option to Load more tempalates at the bottom of the pop-up.
You can now click on the template that you’d like to use. This will add all the properties that are specified in the templates to the contribution or resource you added the template to. Then, you only need to fill out the values of each property and you’re done!
Template Visualization Diagram
The Template Visualization Diagram is a powerful fool in our template system that allows you to visually comprehend the structure and relationships within your templates. It provides a UML-like representation of your templates, making it easier to grasp the overall design and properties associated with each entity. In this article, we will explain the different components of the diagram and how to interpret them.
Entity Representation
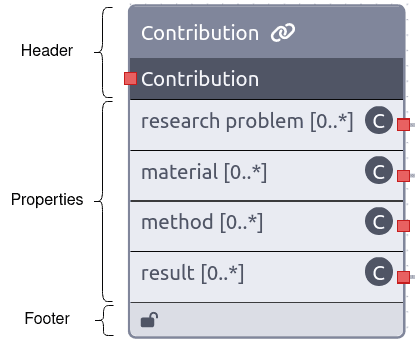
Each entity in the diagram corresponds to a template in the ORKG. The entity consists of three main sections: the header, the properties section, and the footer.
Header
The header of an entity displays the template name at the top, followed by its associated target class. The template name provides a descriptive title for the entity, while the target class indicates the class or type that the template is intended for. This ordering allows you to easily identify the template’s name and its corresponding target class, providing clear context and understanding of the template.
Properties Section
The properites section, located in the middle of the entity, provides essential information about the template’s properties. Each property is representaed by three elements: label, cardinality, and range.
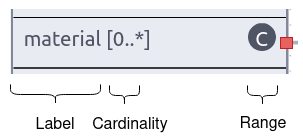
Label
The label represents the name of the property. It gives you an indication of the type of information that can be captured by that property.
Cardinality
The cardinality of a property specifies how many values can be associated with it. It indicates whether the property allows a single value or multiple values. The cardinality is represented as a number or a range, such as 0..1 (optional), 1..1 (mandatory), or 0..* (mulitple values allowed).
Footer
The footer of an entity is a small icon that provides additional information about the template. It indicates whether the template is closed or not. A closed template means that no further properties can be added to it, while an open template allows for additional properties to be defined.
Understanding the Diagram
By examining the Template Visualization Diagram, you can quickly understand the structure of your templates, the properties they contain, and the relationships between different entities. This visual representation simplifies the process of analyzing and designing templates, enabling you to create and modify them with ease.