Creating Templates in the ORKG
In this tutorial, you will find step-by-step instructions for the creation of templates.
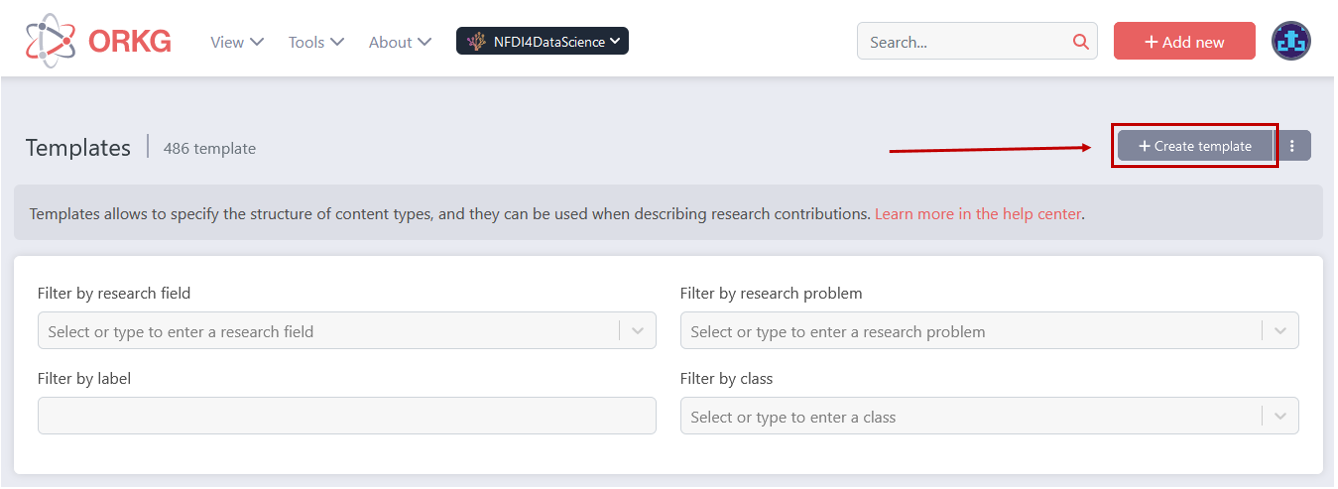
To start the template creation, you will need to click on Create template on this page.
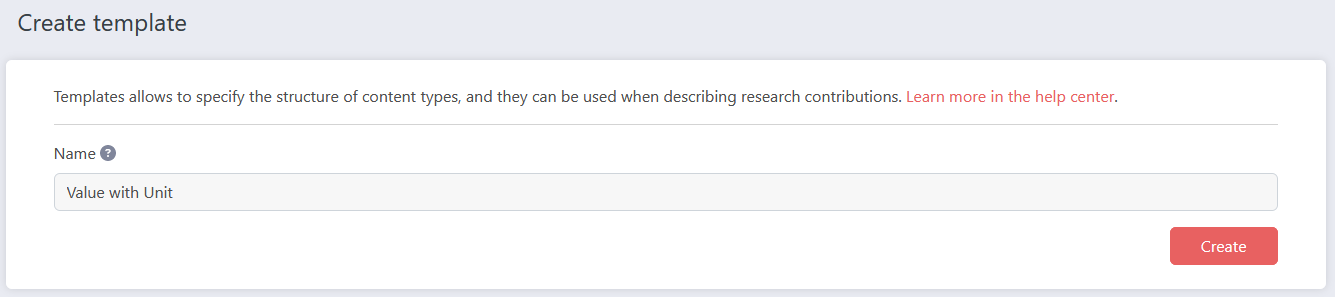
Step 1: Enter the name of your template. Then click on Create. Once you have clicked on this button, an empty template with this name is added to the ORKG.
Step 2: You are now in edit mode for the template, you have created. The tabs Description, Properties and Format can be edited here. In the Description tab you can edit template metadata such as the name of the template and a description. You can also add some optional information such as the research fields for which this template is relevant. Despite being optional it can be very useful to fill out these fields. For example, filling out the Research fields field will suggesti this template in papers relevant to the named research fields. This makes data more coherent and therefore better reusable.
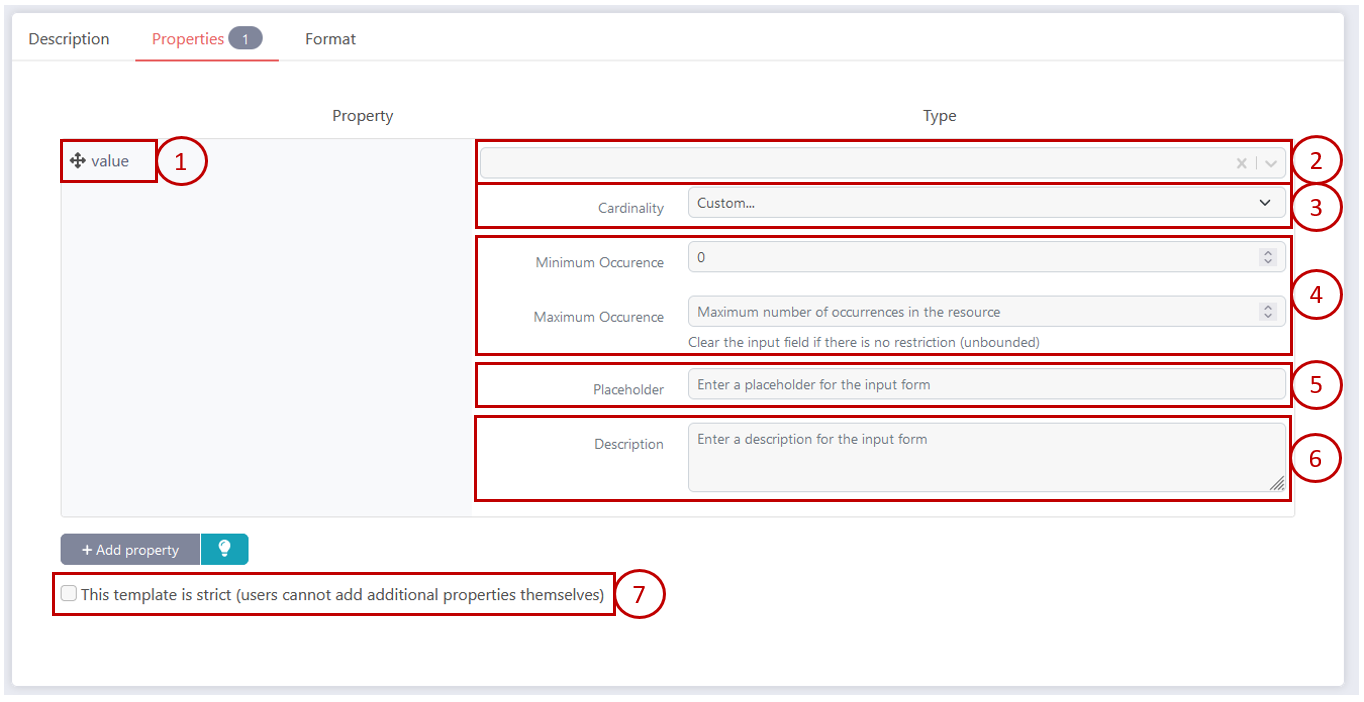
Step 3: The Properties tab is where you need to model the template data. After adding a property, you can specify how the value for this property can look like.
-
This is the label of the newly added property. You can edit or delete it by clicking on the pen or trash can icon below the label.
-
This field specifies the type of the value. You can choose a type from the dropdown menu. If you choose Text, you can then later also specify a pattern for the value. If you choose any number type, i.e. integer or decimal, you can also specify a minimal and maximal value.
-
Here, you can specify the cardinality of this property.
-
If you chose the custom cardinality, you can choose the minimum and maximum occurences here.
-
Here, you can specify a placeholder that will be displayed in case a user who uses the template does not fill in a value for this property.
-
You can now add a description for the input form.
-
If you don’t want other users to be able to add additional properties when using this template, check this box.
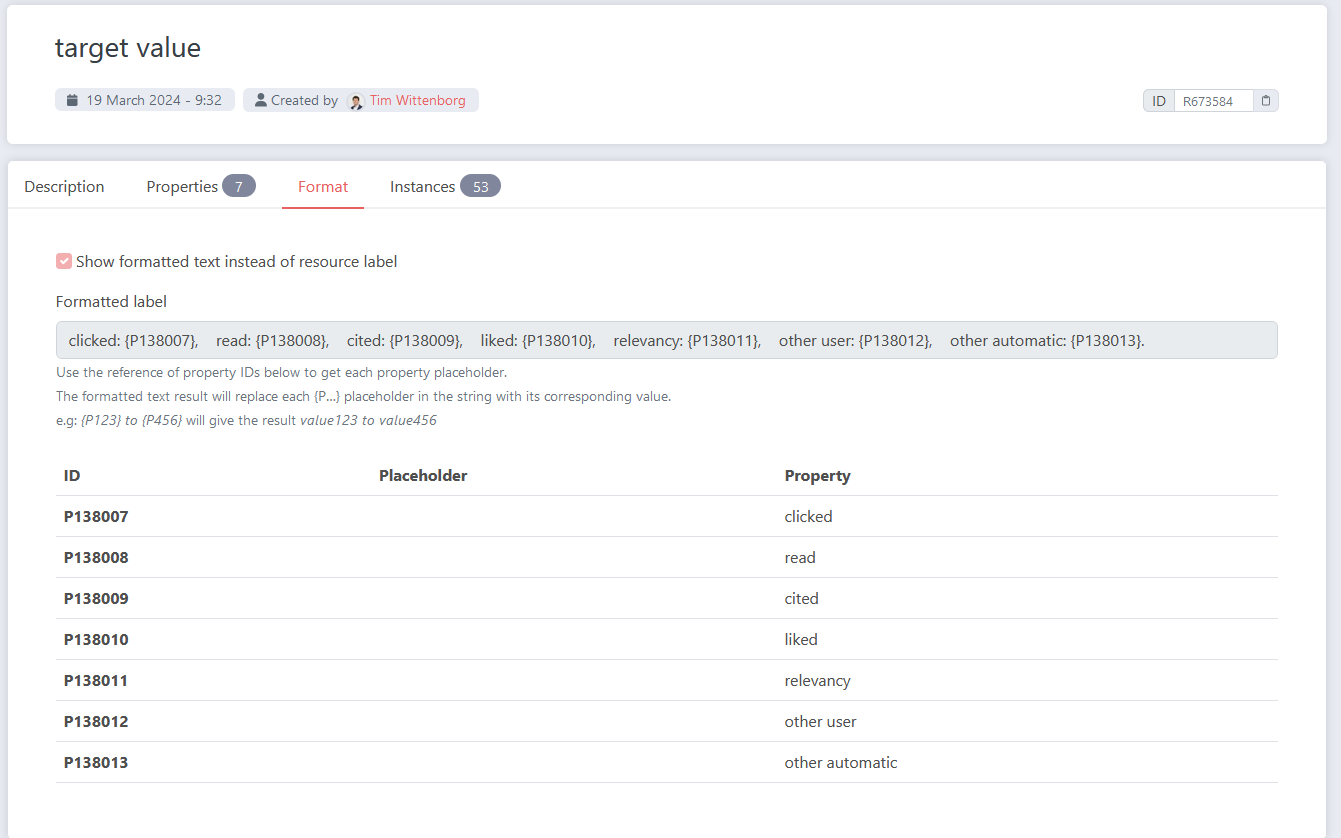
Step 4: If you want the resources that use this template to have a meaningful label, you can check the box Show formatted text instead of resource label in the Format tab. This reveals an input field and a table below. In the input field you can specify the new formatted label that each resource created with your template will have. Use the property ID from the table below in curly braces as placeholders for the respective values.
Step 5: Once you are happy with your template, you can click Save on the top right of the page. Your template is now ready to use!

What next?
-
If you are wondering how to use your newly created template, take a look here.
-
Now that you have a template, try adding a paper with it.
-
You might have noticed the blue lightbulb symbol while adding your properties. Learn more about that here: Using ChatGPT in the ORKG with Smart Suggestions